
Who doesn’t love an advent calendar. They are a Christmas staple. It’s one of the best ways to get the kids and us adults to be patient about counting down to Christmas. I mean we get a little gift every day leading up to THE BIG DAY. But if the calendar isn’t filled with toys, they are filled cookies. So every cookier is usually in search of the advent cookie boxes to put their cookies in. The OG cookiers know that if you don’t catch those advent cookie calendar boxes by the beginning of November, you are pretty much out of luck. But don’t fret because Im here to tell you there is an alternative… DIY!
I’m going to show you how I did 1of my DIY advent cookie calendars. I only made 12 days but feel free to go up to 24. Click the link to download my Free Advent Calendar Tag Template.
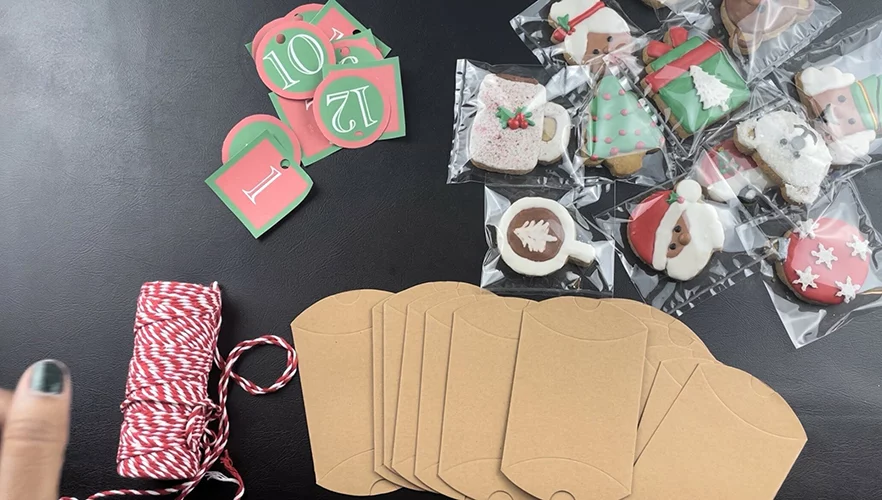
Materials
– Mini Cookies
– Numbered Tags
– Scissors
– Heat Sealer
– Mini Boxes
– Tape
– Clear Bags
– Hole Pucher
– Twine
– Fabric
– Basket or Large Box
– Christmas Decorations
Step One: Decorating The Cookies

With this advent calendar like most, everything is mini. So your cookies should be 2- 2.5”. I love decorating cookies so I made my own but you could always buy some minis from your local baker.
If you are making them yourself make sure to put the cookies in a food safe sealed bag so they stay yummy and fresh. I heat seal mine with a heat sealer. If you’re buying them the should already come in packaging.
Step Two: Cookies and Their Box
Now that our cookies are nice and packaged its time to put them in their mini boxes. These little envelope boxes are perfect for mini cookies and they come in a few colors. I pre bent each side so it would be easier for me to use. It’s not something that has to be done but it made it easier for me.
Once the cookies are in the box just fold each side, close and tape it.
Step Three: Twine and Tags
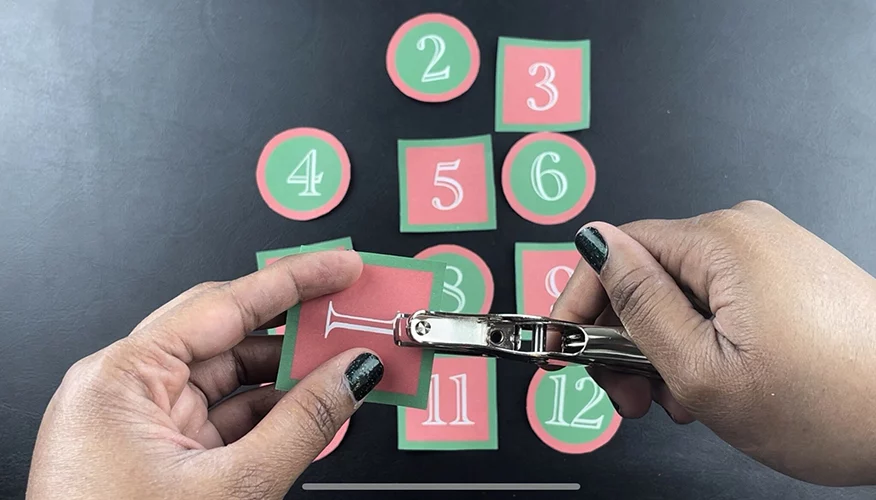
If you used a template like the one I provided above you are going to have to cut them out and punch a hole in them. I love my hole puncher because its small but holds a lot of scraps. If you purchased your tags, you can skip this step.
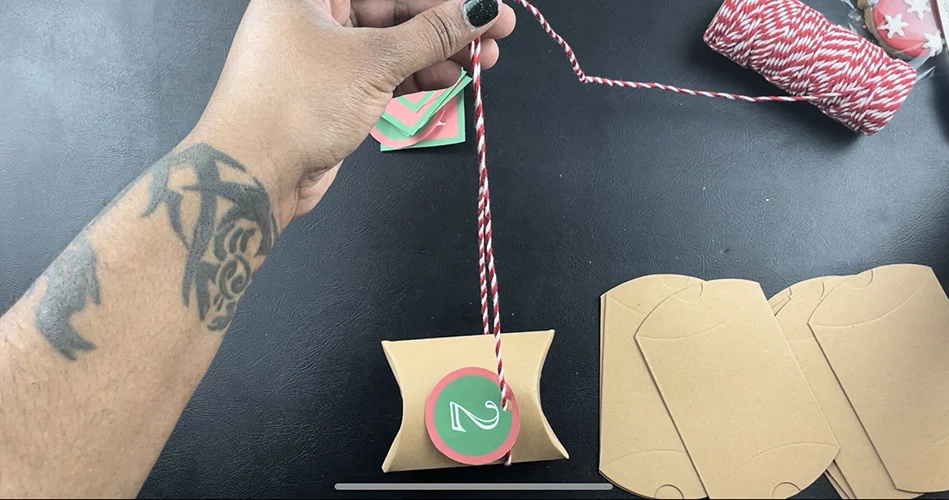
Next you will need to measure your twine.
Start by wrapping it around 1of the filled mini cookie boxes and leave enough excess length for you to tie your bow. My Strings were about 16”.
Once you have your 12 or 24 strings, you can start putting them through the tags.
From there you can tie them to the boxes. Mine looked like this. Repeat the same steps for all 12 or 24 boxes.
Step Four: Putting Together Your Basket
You can use a basket or any medium size box. Line it with some festive fabric and attach some fun Christmas trinkets to decorate it. Get creative, especially if it’s for kids. When your basket/box is done and looking all Christmasy, it’s time to put in those cookie boxes. You can stack them in the order of your choice.

THAT’S IT!
Mine is going to sit on our table until well its 12 days til Christmas.
I hope this was helpful. They are truly a joy to make.
This blog has affiliate links which means I get a small commission if you purchase but it will be no extra cost to you. TIA

DIY Advent Cookie Calendar
Who doesn’t love an advent calendar. They are a Christmas staple. It’s one of the best ways to get the kids and us adults to be patient about counting down to Christmas. I mean we get a little gift every day leading up to THE BIG DAY. But if the calendar isn’t filled with toys, they are filled cookies. So every cookier is usually in search of the advent cookie boxes to put their cookies in. The OG cookiers know that if you don’t catch those advent cookie calendar boxes by the beginning of November, you are pretty much out of luck. But don’t fret because Im here to tell you there is an alternative… DIY!
Materials
- Mini Cookies
- Numbered Tags
- Scissors
- Heat Sealer
- Mini Boxes
- Tape
- Clear Bags
- Hole Pucher
- Twine
- Fabric
- Basket or Large Box
- Christmas Decorations
Instructions
Step One: Decorating The Cookies
With this advent calendar like most, everything is mini. So your cookies should be 2- 2.5”. I love decorating cookies so I made my own but you could always buy some minis from your local baker.
If you are making them yourself make sure to put the cookies in a food safe sealed bag so they stay yummy and fresh. I heat seal mine with a heat sealer. If you’re buying them the should already come in packaging.
Step Two: Cookies and Their Box
Now that our cookies are nice and packaged its time to put them in their mini boxes. These little envelope boxes are perfect for mini cookies and they come in a few colors. I pre bent each side so it would be easier for me to use. It’s not something that has to be done but it made it easier for me.
Once the cookies are in the box just fold each side, close and tape it.
Step Three: Twine and Tags
If you used a template like the one I provided above you are going to have to cut them out and punch a hole in them. I love my hole puncher because its small but holds a lot of scraps. If you purchased your tags, you can skip this step.
Next you will need to measure your twine.
Start by wrapping it around 1of the filled mini cookie boxes and leave enough excess length for you to tie your bow. My Strings were about 16”.
Once you have your 12 or 24 strings, you can start putting them through the tags.
From there you can tie them to the boxes. Mine looked like this. Repeat the same steps for all 12 or 24 boxes.
Step Four: Putting Together Your Basket
You can use a basket or any medium size box. Line it with some festive fabric and attach some fun Christmas trinkets to decorate it. Get creative, especially if it’s for kids. When your basket/box is done and looking all Christmasy, it’s time to put in those cookie boxes. You can stack them in the order of your choice.
THAT’S IT!
Mine is going to sit on our table until well its 12 days til Christmas.
I hope this was helpful. They are truly a joy to make.