Greetings, bakers and decorators! If you’re on the hunt for a simple yet stunning cookie decoration technique that adds texture, dimension, and a sometimes touch of elegance to your baked creations, look no further than our White Crackle Effect Tutorial. This technique, achieved with the help of the White Americolor Gel Food Color, will transform your cookies into miniature works of art that are a delight to the eyes as they are to the taste buds. In this tutorial, we’ll guide you through every step, pro tips, and creative variations to help you master this cookie decoration method.
Who Will Love This Tutorial and Why It’s Exceptional
Our White Crackle Effect Cutout Cookie Tutorial is tailor-made for all bakers. With its minimal prep time and easy to execute, this tutorial is perfect for home bakers who want to achieve professional-level results without the hassle. It’s an ideal technique for elevating cookies destined for elegant tea parties, delightful baby showers, and even spooky Halloween gatherings.
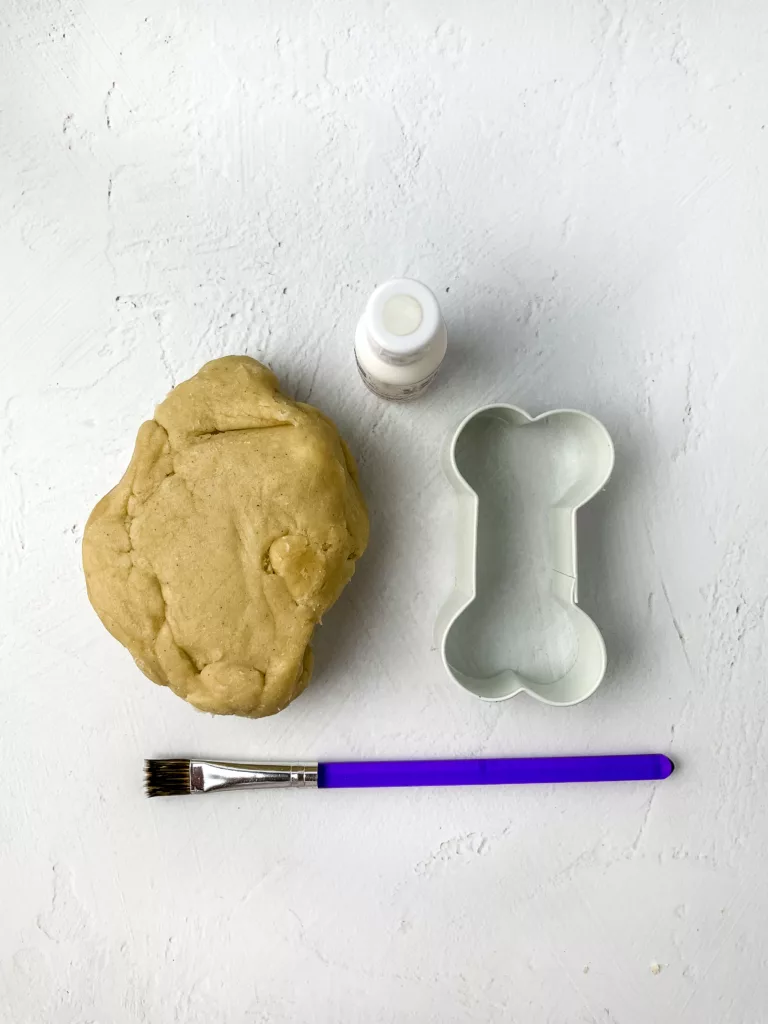


Equipment You’ll Need
Let’s ensure you have the necessary tools to make your decorating journey a success:
- Cookie Cutter
- Rolling Pin
- Parchment Paper
- Paint Brush
- Paint Palette
- Cookie Sheet
Ingredients
- Cookie Dough using your recipe of choice.
- White Americolor Gel Food Color
Crafting the White Crackle Effect Cutout Cookies
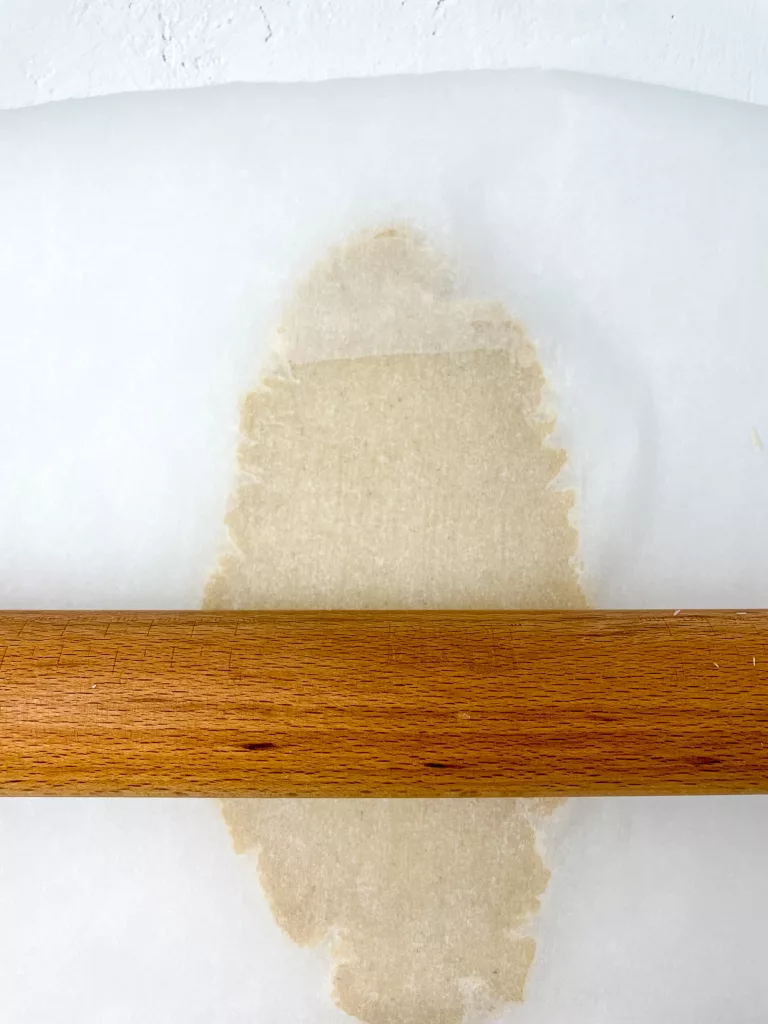
- Roll Out the Dough: Begin by rolling out your cutout cookie dough to your desired thickness between two sheets of parchment paper. The parchment paper prevents sticking and makes cleanup a breeze.
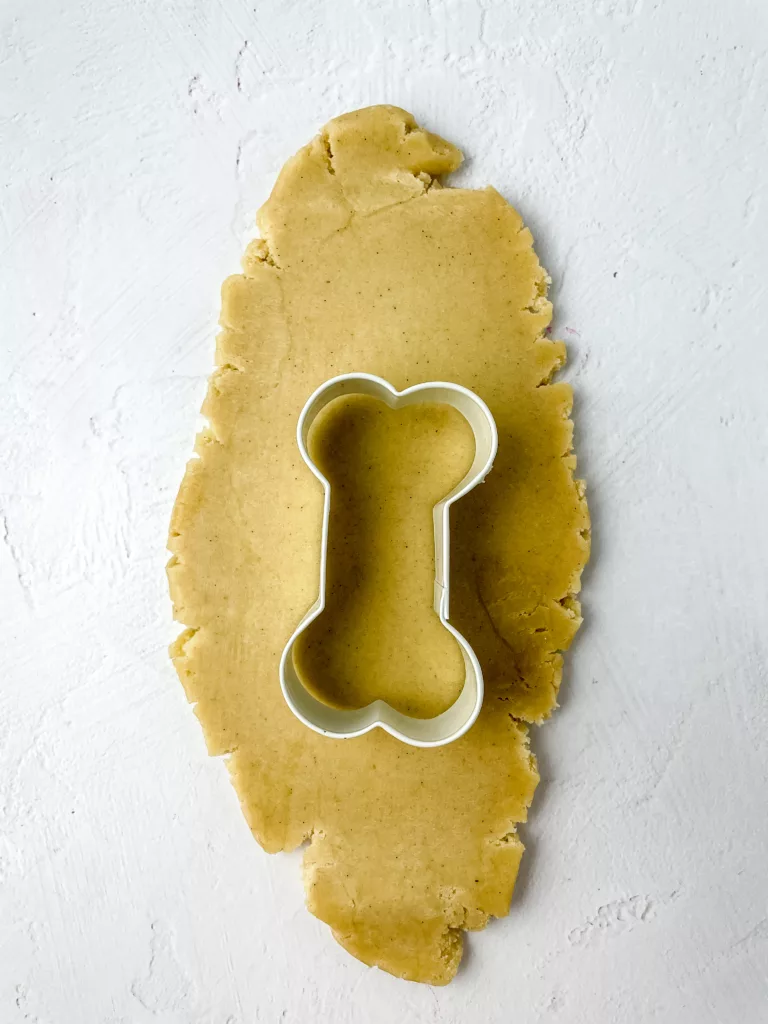
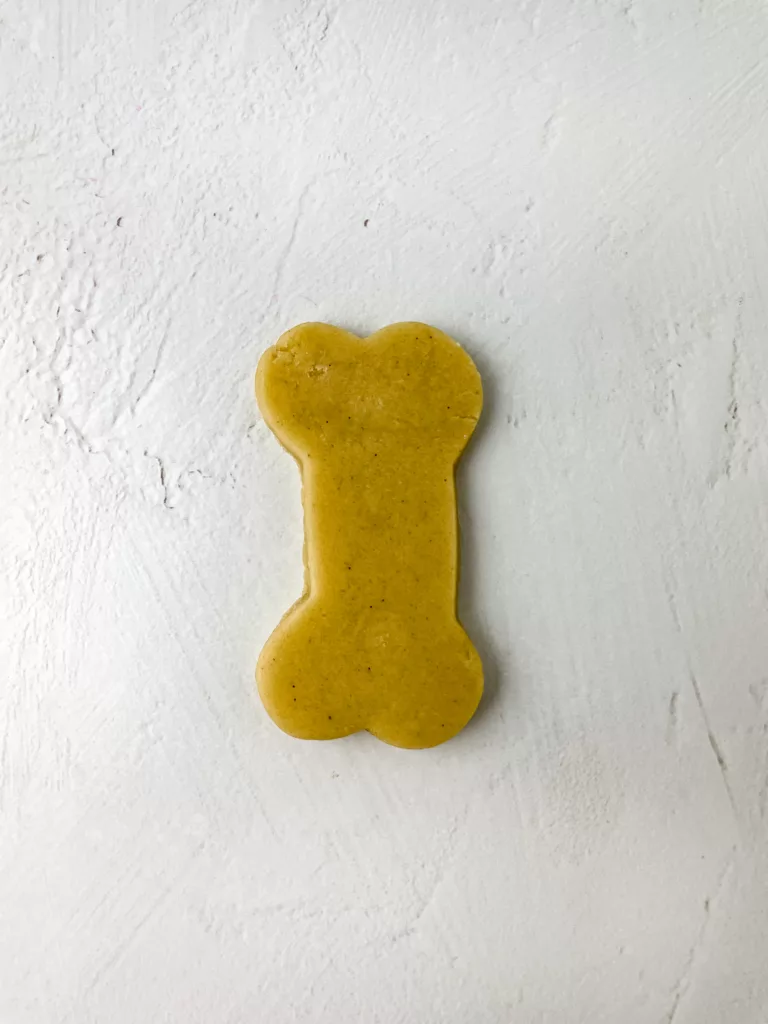
- Cut Out Shapes: Use your cookie cutter to press down into the rolled-out dough. Gently remove the bone shape and place it on a flat surface or directly on a cookie sheet. Repeat this process until you have the desired number of bone-shaped cookies.
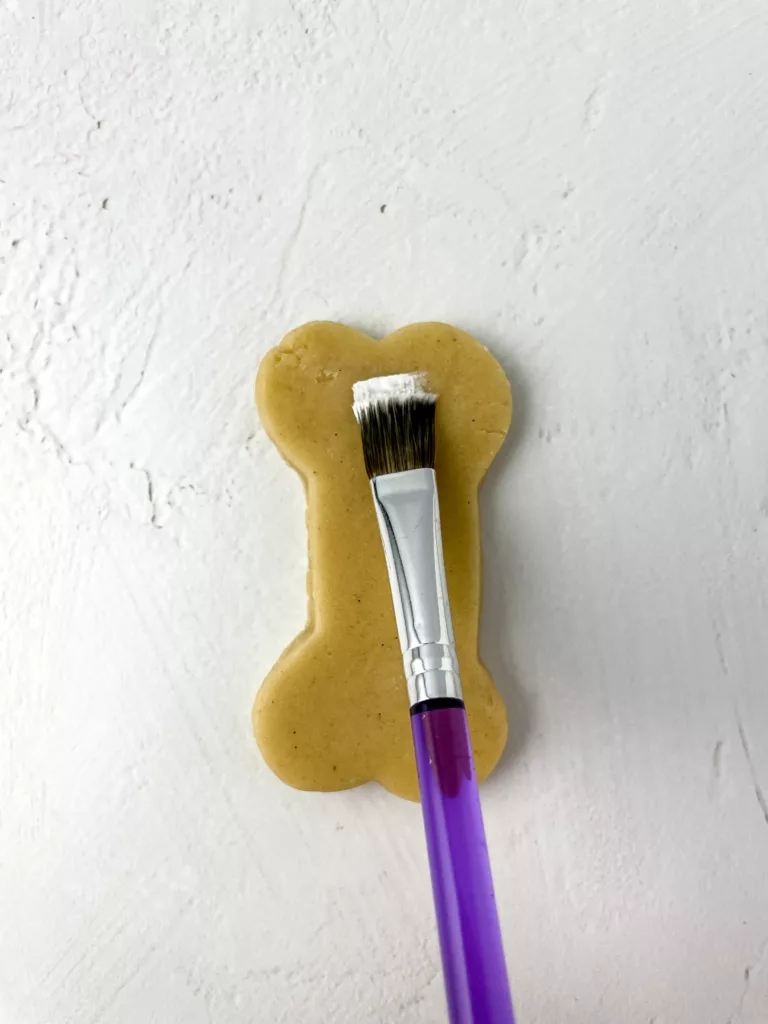
- Prepare the Crackle Effect: For the enchanting white crackle effect, you’ll need White Americolor Gel Food Color. Wet your paintbrush slightly and dip it into the gel color in the paint palette.
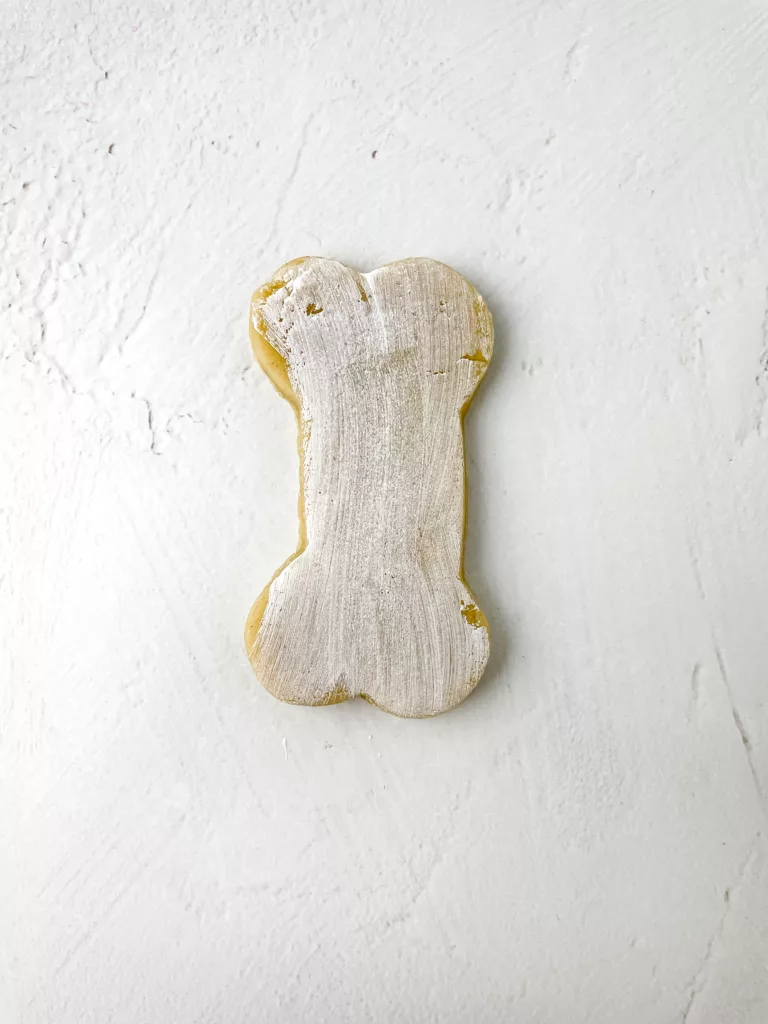
- Paint the Cookies: With the damp paintbrush, pick up the white gel color and apply it to the surface of the bone-shaped cookies. Be sure to cover the entire surface of each cookie with the color.
- Optional Chill: If desired, place the painted cookies in the fridge for about 10 minutes. This step helps set the gel color and prevents any smudging during baking.
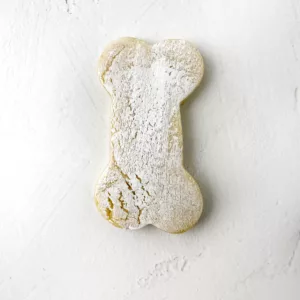
- Bake and Cool: Bake your cookies according to your cutout cookie dough recipe. Once baked, remove them from the oven and allow them to cool to room temperature on a wire rack.
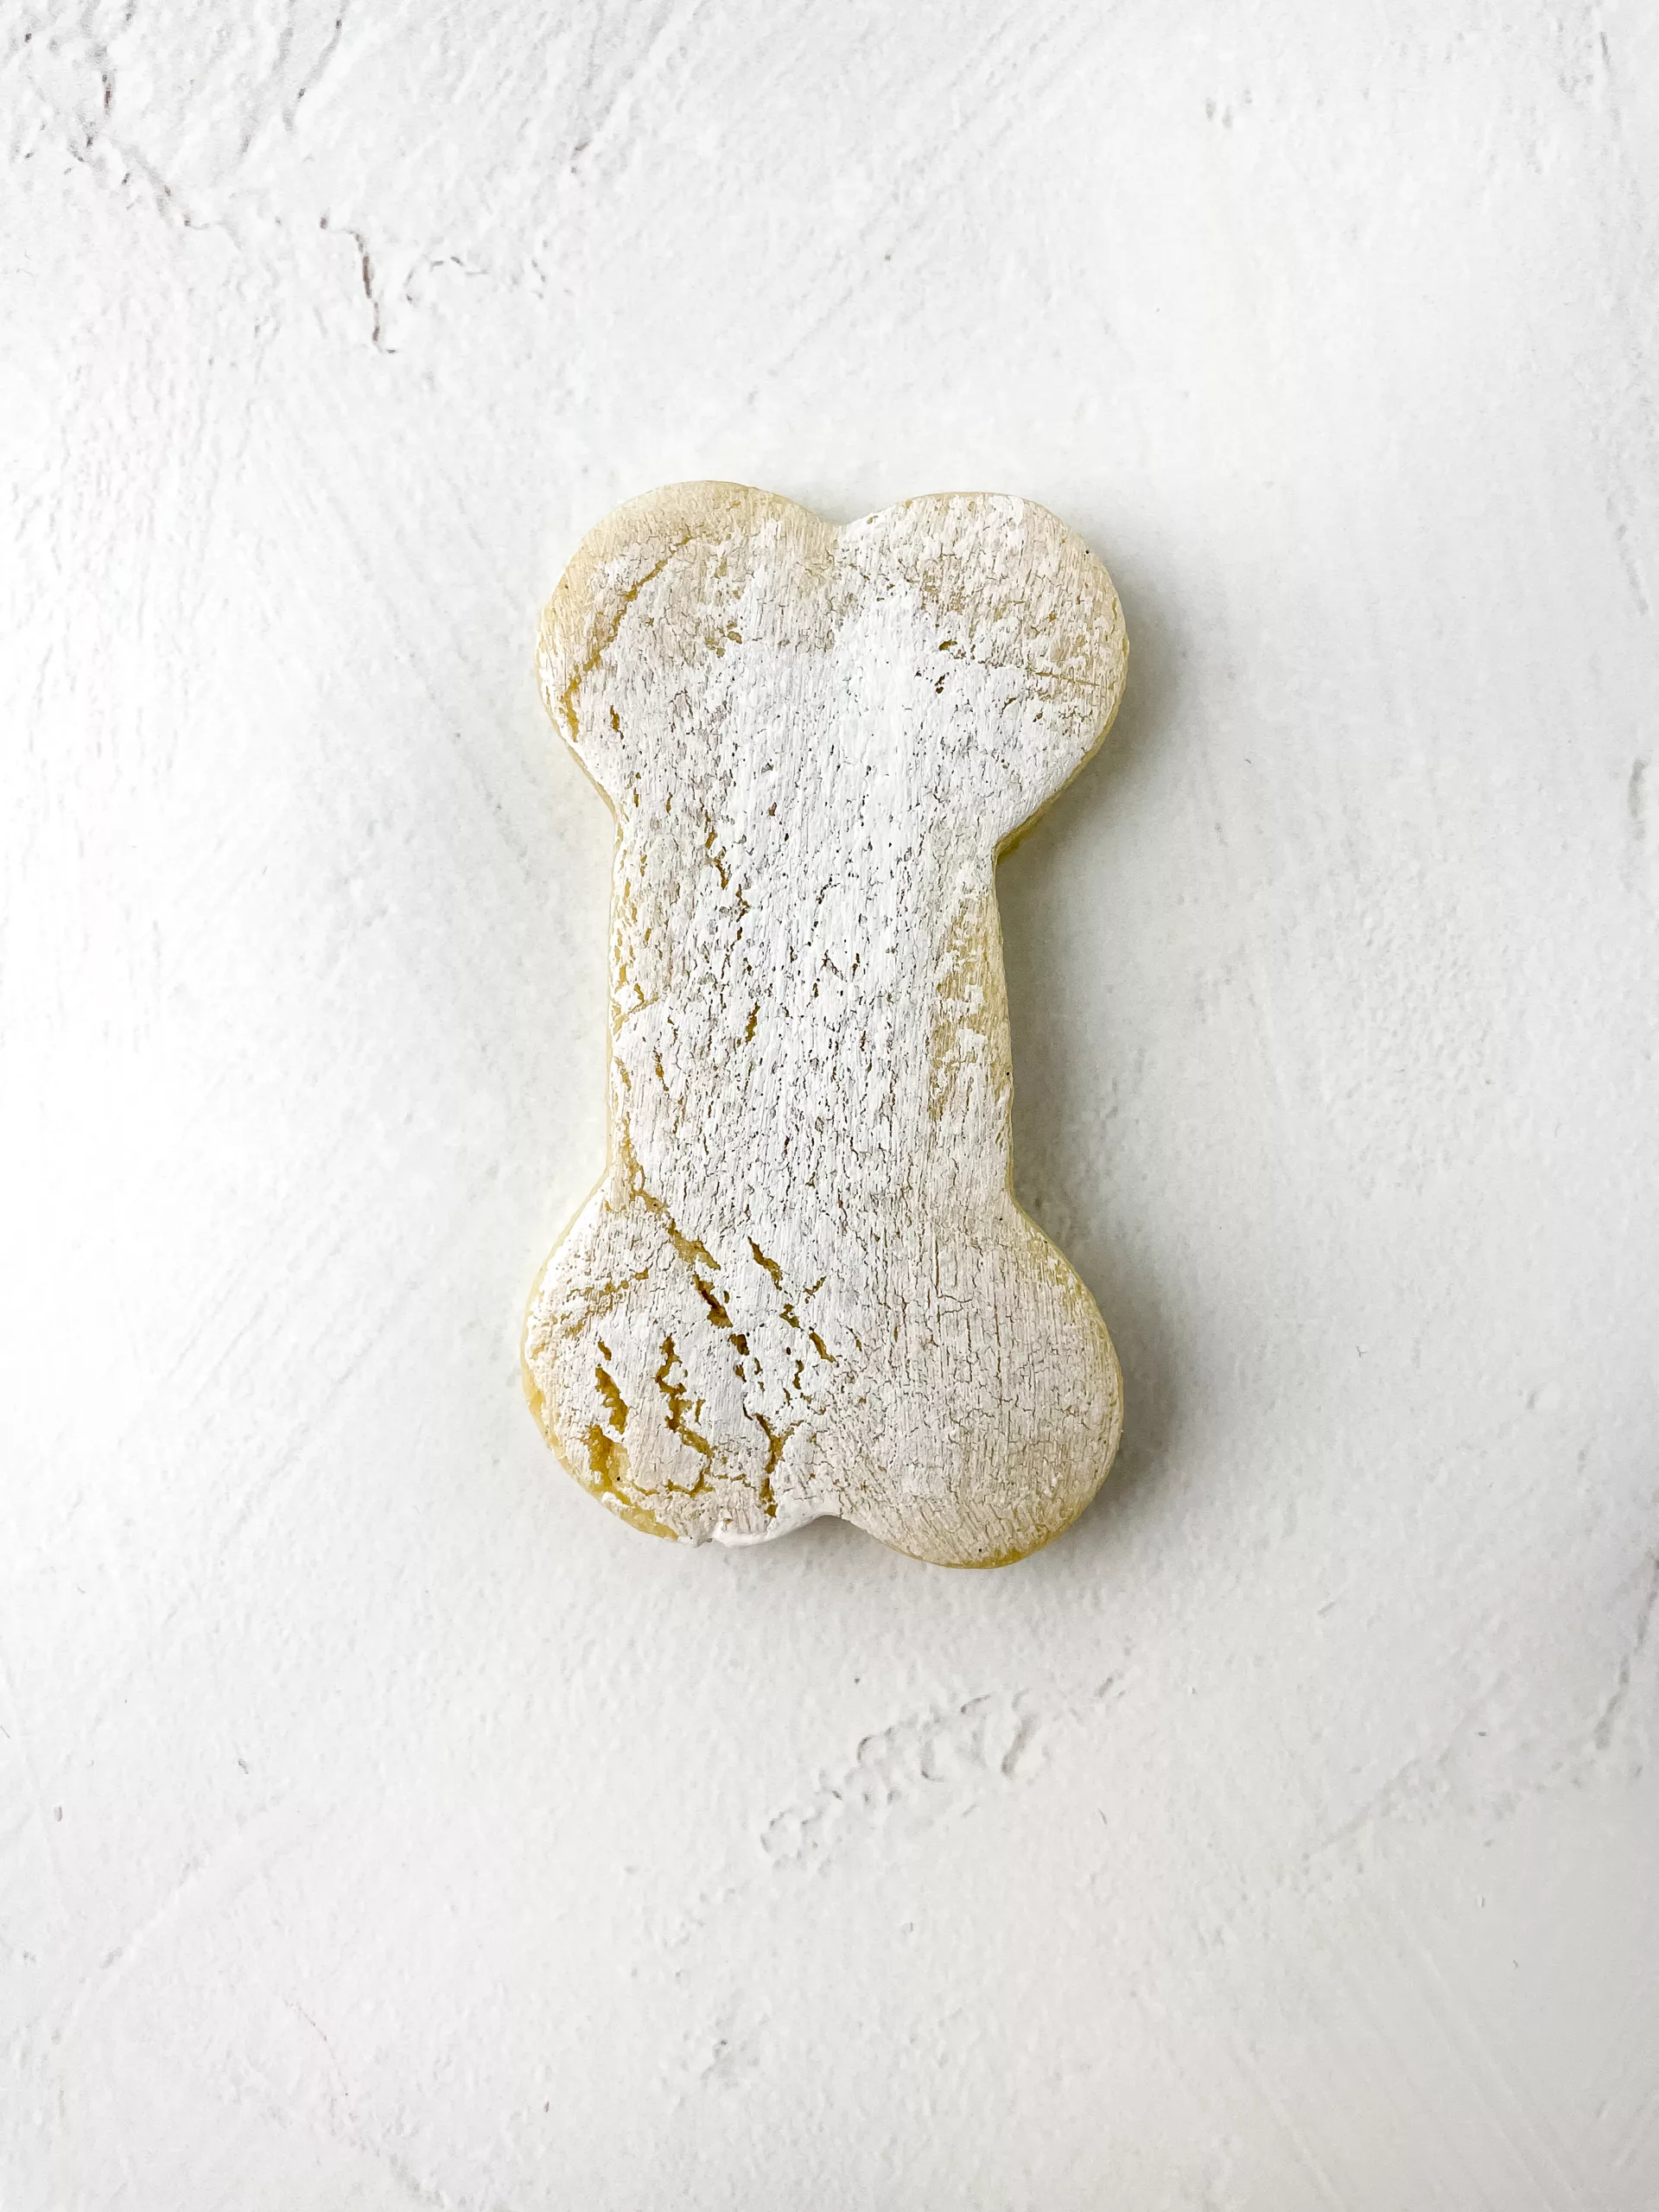
- Admire the Magic: Behold the mesmerizing white crackle effect that has transformed your cookies into edible works of art.
Pro Tips and Creative Variations
- Adaptable to Any Shape: While this tutorial features -shaped cookies, feel free to apply the crackle effect to other cookie shapes for a captivating twist.
- Delicate Dampness: When wetting your paintbrush, ensure it’s only slightly damp, as excessive moisture may affect the texture of the cookie.
Storing Your Masterpieces
To keep your White Crackle Effect Cutout Cookies looking their best,It’s most ideal to heat seal your cookies in a bag for up to 2 weeks.
Here are some other tips to store your cookie:
Store them in an airtight container, with parchment paper in between each cookie at room temperature for up to a week, or
You can freeze the cookies while in the airtight container for up to 3 months.To thaw them be sure to allow them to sit out on a flat surface in the container until they come to room temperature before opening to retain their delicate texture and captivating appearance.
FAQ’s
Q: Can I use this technique with other food colors?
A: While the White Americolor Gel Food Color is recommended for achieving the crackle effect, you can experiment with other light-colored gel colors. However, results may vary.
Q: Can I freeze the decorated cookies for later use?
A: While the technique itself is not affected by freezing, the crackle effect may change in appearance due to the moisture content of the cookies. It’s best to enjoy these cookies fresh.
Share Your Cookie Masterpieces
Now that you’re equipped with the secrets to creating captivating White Crackle Effect Cutout Cookies, it’s time to unleash your creativity in the kitchen. Don’t forget to share your enchanting creations on social media and tag us at @Torriemadeit to spread the magic of your edible artworks. For more inspiring tutorials, delectable recipes, and creative baking ideas, be sure to subscribe to our blog. Happy baking and happy decorating!
How to Create the White Crackle Effect on Cutout Cookies Tutorial
Equipment
- Cookie Cutter
- Rolling Pin
- Parchment Paper
- Paint Brush
- Paint Palette
- Cookie Sheet
Ingredients
- Cookie Dough using your recipe of choice.
- White Americolor Gel Food Color
Instructions
- Roll Out the Dough: Begin by rolling out your cutout cookie dough to your desired thickness between two sheets of parchment paper. The parchment paper prevents sticking and makes cleanup a breeze.
- Cut Out Shapes: Use your cookie cutter to press down into the rolled-out dough. Gently remove the bone shape and place it on a flat surface or directly on a cookie sheet. Repeat this process until you have the desired number of bone-shaped cookies.
- Prepare the Crackle Effect: For the enchanting white crackle effect, you'll need White Americolor Gel Food Color. Wet your paintbrush slightly and dip it into the gel color in the paint palette.
- Paint the Cookies: With the damp paintbrush, pick up the white gel color and apply it to the surface of the bone-shaped cookies. Be sure to cover the entire surface of each cookie with the color.
- Optional Chill: If desired, place the painted cookies in the fridge for about 10 minutes. This step helps set the gel color and prevents any smudging during baking.
- Bake and Cool: Bake your cookies according to your cutout cookie dough recipe. Once baked, remove them from the oven and allow them to cool to room temperature on a wire rack.
- Admire the Magic: Behold the mesmerizing white crackle effect that has transformed your cookies into edible works of art.
Notes
Pro Tips and Creative Variations
- Adaptable to Any Shape: While this tutorial features -shaped cookies, feel free to apply the crackle effect to other cookie shapes for a captivating twist.
- Delicate Dampness: When wetting your paintbrush, ensure it’s only slightly damp, as excessive moisture may affect the texture of the cookie.
One Comment