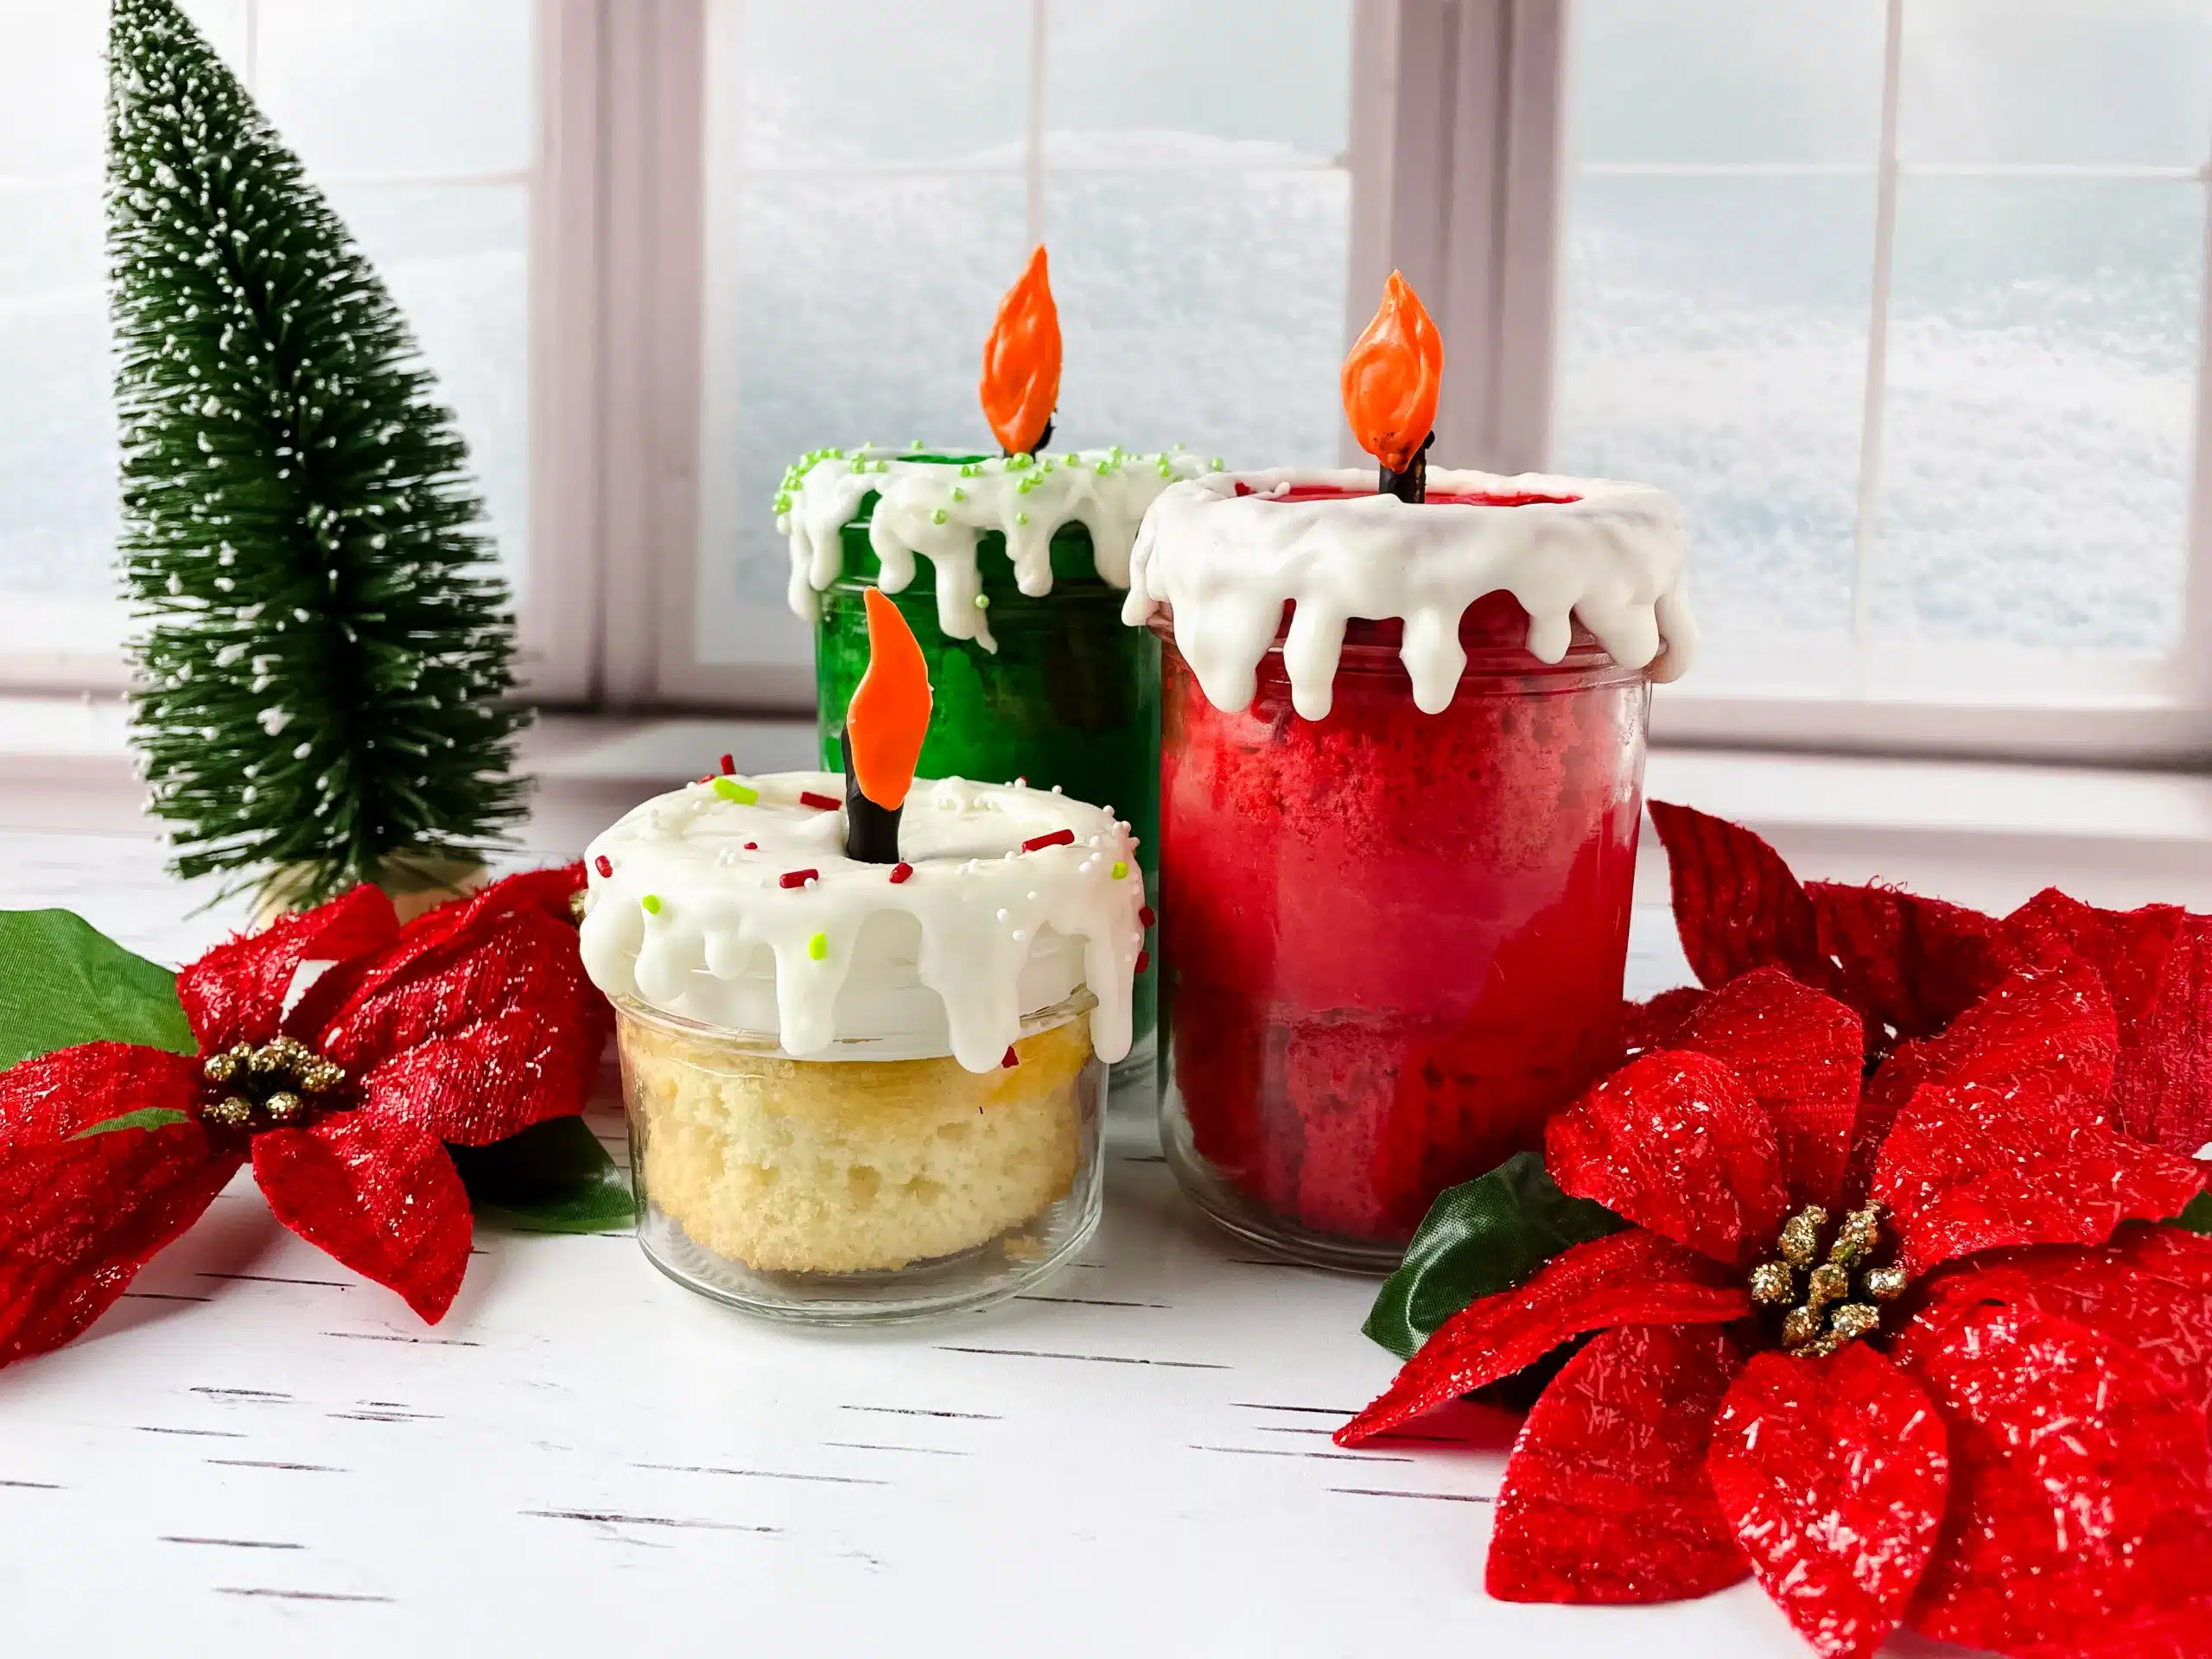
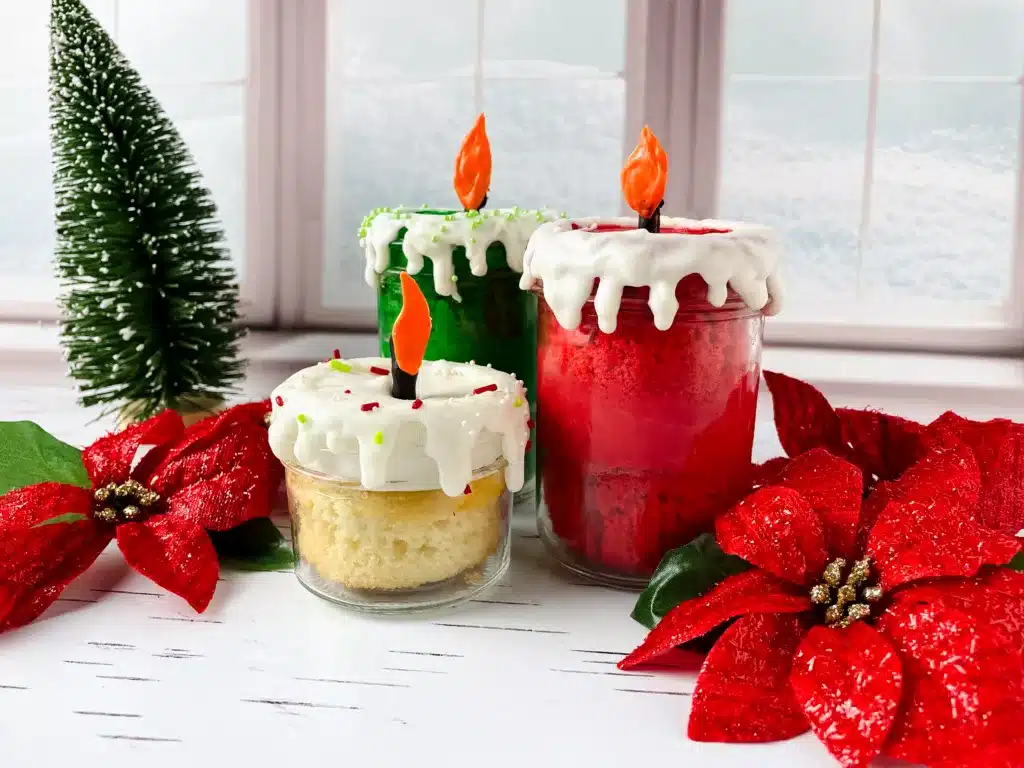
Indulge in a delectably unique treat with our Cake Candle Jars Recipe Tutorial. Craft edible candles using cupcakes and a dash of creativity
Candles have long been a source of warmth and comfort, but what if you could craft candles you could eat? Well let me show you how, with this unique recipe tutorial, brings together the art of baking and candle-making to create delightful cake candle jars that not only look like candles but are also entirely edible. With a few simple ingredients and some creativity, you can produce these charming candle cake jars that are perfect for special occasions or simply to indulge in a fun festive edible project.
Equipment:
Gather your equipment before diving in. You’ll need measuring cups, three small bowls, a spatula, piping bags, three small microwave-safe bowls, and three jars (two big and one small) to contain your edible candle creations.
Yields:
3 candle cake jars and involves a prep time of 8 minutes, active time of 28 minutes, and idle time of 15 minutes, resulting in a total time of 43 minutes.
Ingredients:
- 2 Red Cupcakes
- 2 Green Cupcakes
- 1 White Cupcake
- Mini Pretzel Sticks
- White Buttercream
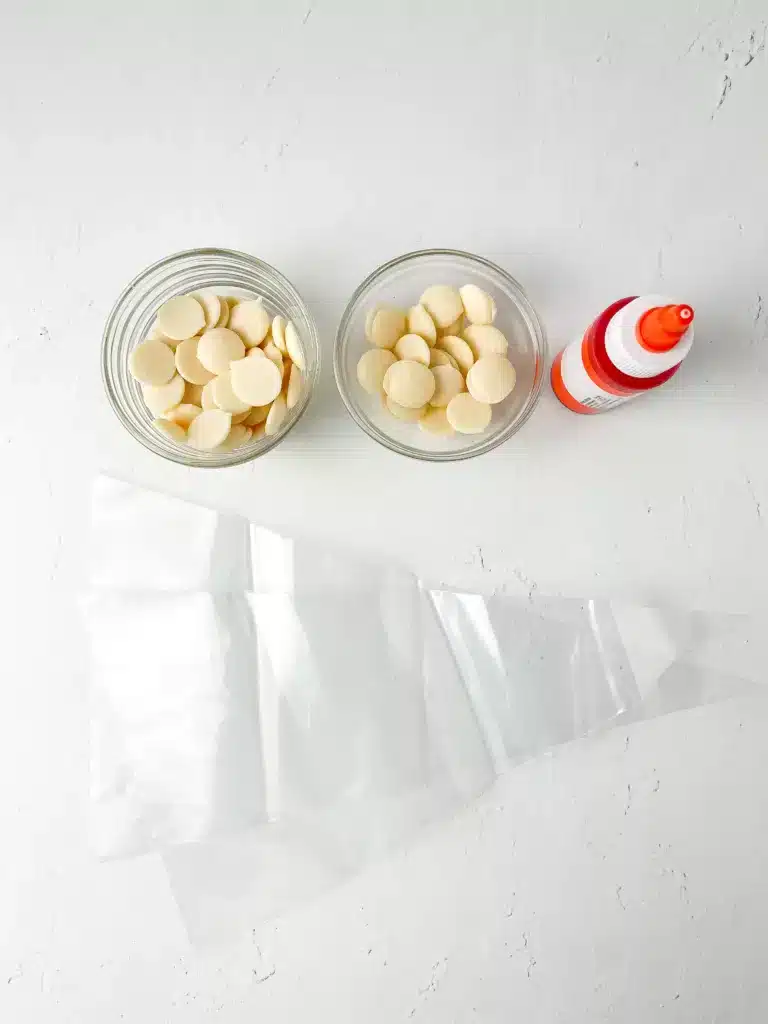
- 3 ounces White Chocolate Candy Melts
- Black Chocolate Candy Melts
- Orange Candy Color
- Red Food Gel Color
- Green Food Gel Color
- Sprinkles (optional)
Instructions:
- Begin by splitting your white chocolate melts into two microwave-safe bowls. Place a third or 1 ounce of the white melts in one bowl and the rest in the other. Heat up the chocolate in both bowls for 30 seconds and then stir. If the chocolate has not completely melted, place them back in the microwave, warming them in 15-second intervals while stirring until the chocolate achieves a liquid consistency.
- Add 3 drops of orange Candy Color into the smaller bowl of melted chocolate and mix thoroughly. If you have orange chocolate melts, you can skip this step.
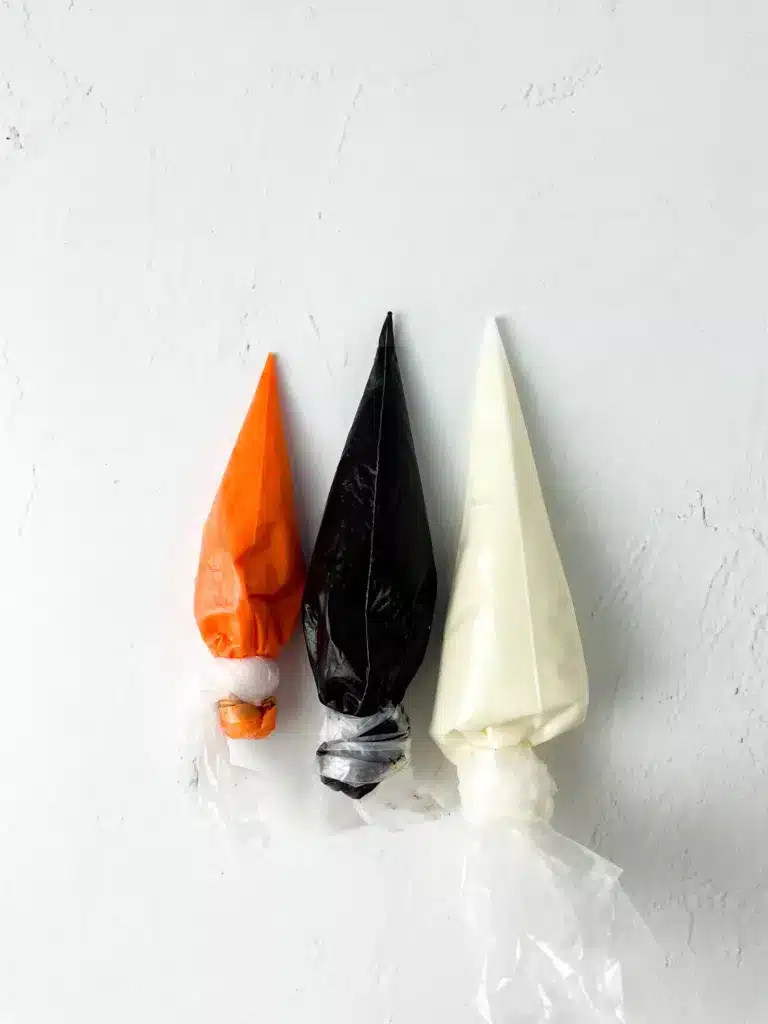
- Transfer the melted chocolates into separate piping bags, tying the ends securely.
- Melt your black candy melts using the same method as above.
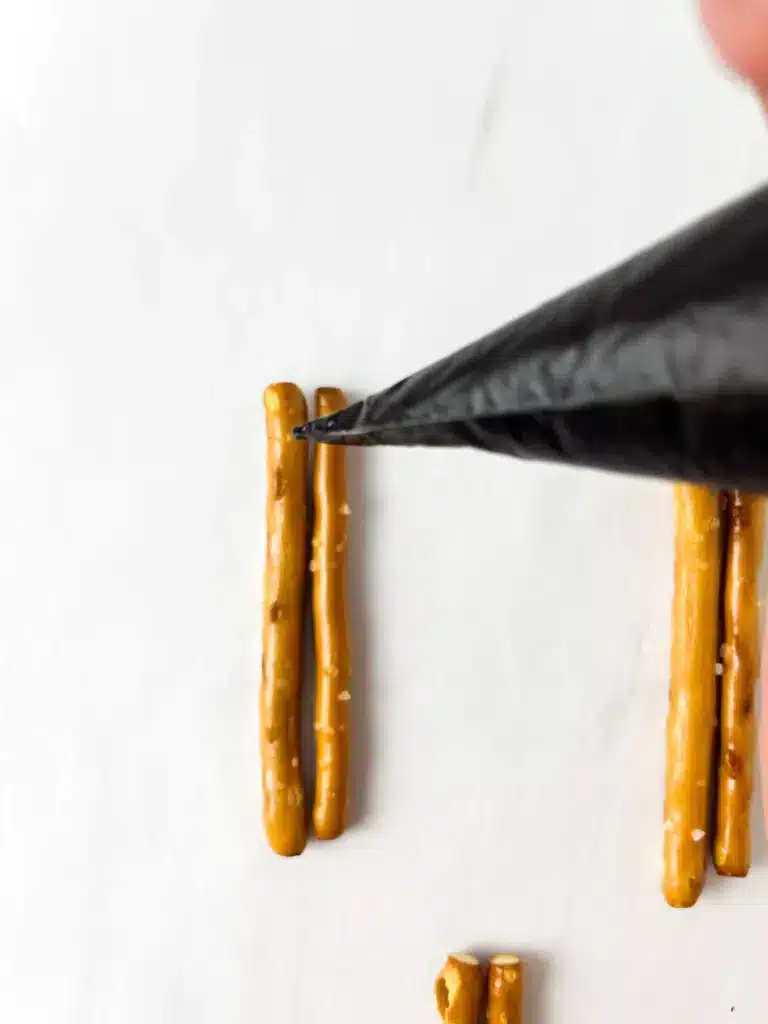
- Place pretzel sticks on a sheet of parchment paper and either pipe or dip them in the black chocolate.
- With the orange chocolate, create small tear drops on another sheet of parchment paper. These will serve as the flames. Let both the pretzel sticks and flames sit for 10 minutes to dry.
- Once solid, put 1-2 drops of orange chocolate on the tip of the pretzel and attach the orange flame. Let it dry for an additional 5 minutes.
- While the items are drying, divide your buttercream frosting into three separate bowls. Color one bowl of frosting green, another red, and leave the third bowl white.
Assemble the Green & Red Candles:
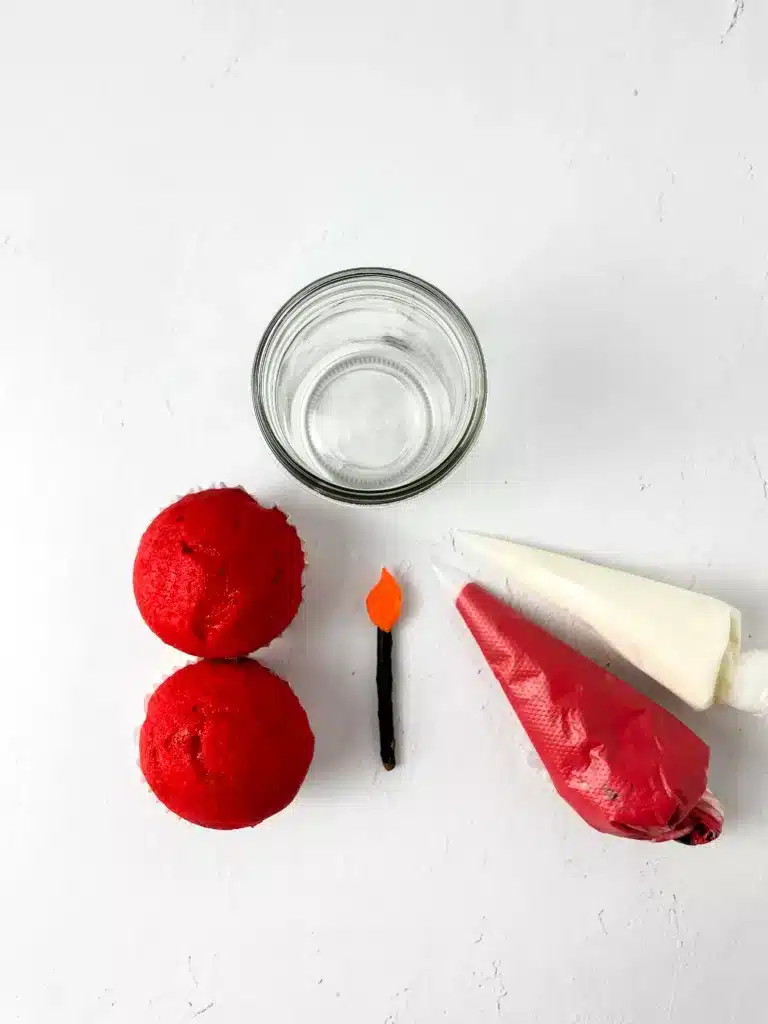
- Place one cupcake in the jar, gently pressing it down to touch the bottom.
- Add a layer of buttercream in the jar on top of the cupcake, either using a piping bag or spoon.
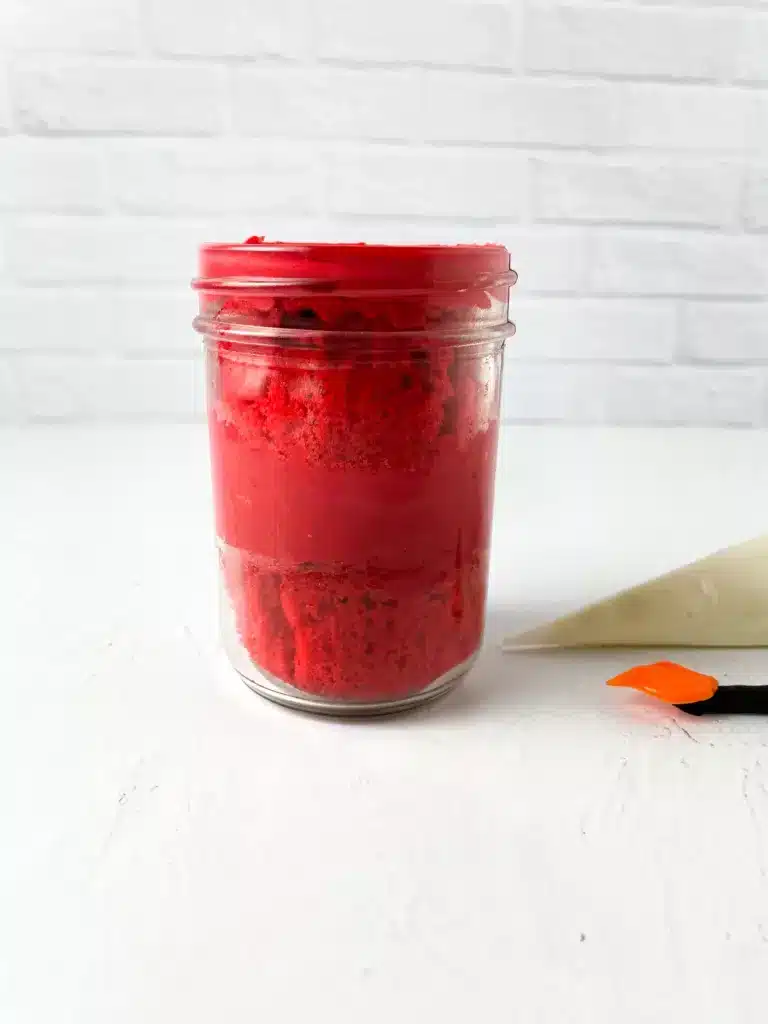
- Position another cupcake on top of the buttercream and add more buttercream on top of the second cupcake. Smooth the top using a spoon or spatula.
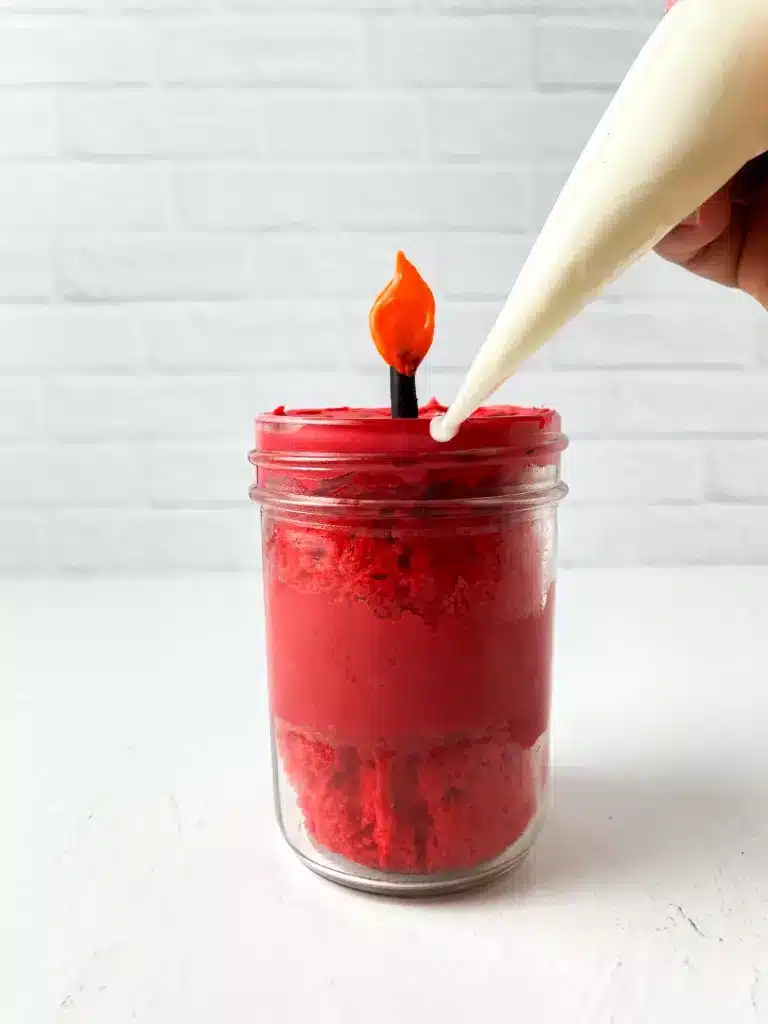
- Insert the pretzel candle wick in the middle of the jar.
- Warm the white chocolate in the piping bag for 15 seconds to make it liquid again. Cut a small hole at the tip of the bag.
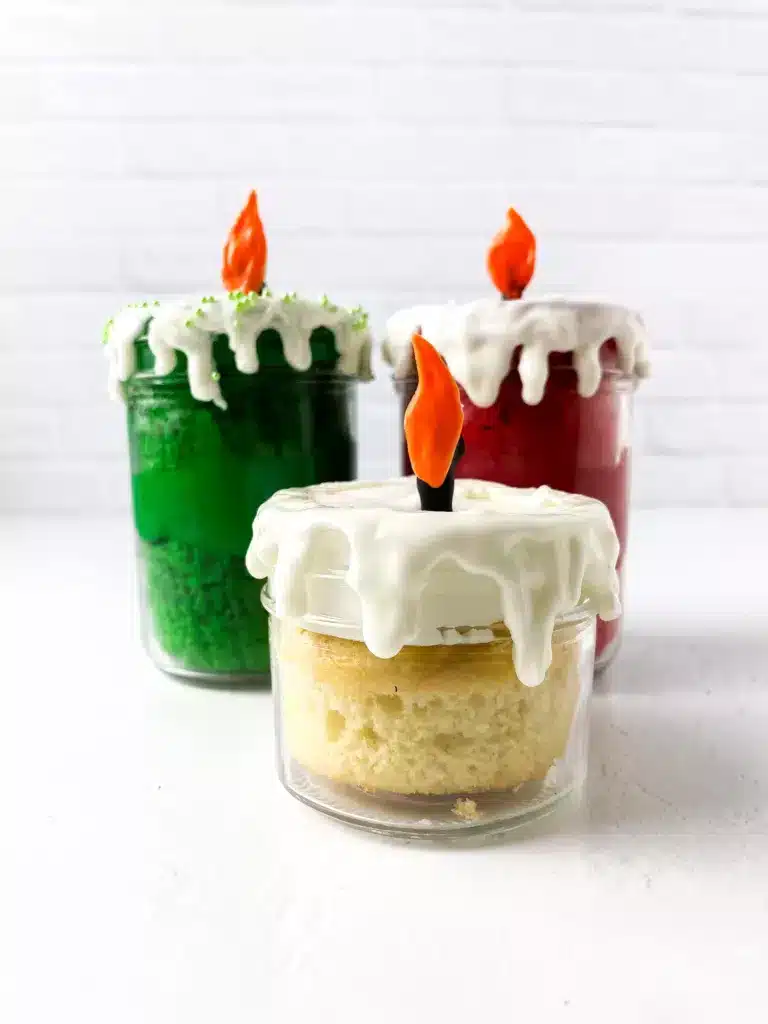
- Pipe the chocolate around the top of the jar, allowing it to drip down the sides. Apply some chocolate on the buttercream frosting to create a melted candle effect.
- Repeat the same assembly steps for the small white candle.
- If you plan to add sprinkles or decorations, do so while the chocolate is still wet.
- Once the chocolate has solidified, display the candles or indulge in this delicious creation!
Tips for Creativity and Variations:
- Experiment with Flavors: Feel free to explore different cupcake flavors to add variety. Chocolate, vanilla, or even flavored cupcakes like lemon or strawberry can be used.
- Customize the Colors: Change the colors to suit different themes or occasions. Pastels for baby showers, red and green for Christmas, or bold colors for birthdays.
- Play with Decoration: Sprinkles, edible glitter, or even small edible pearls can add a touch of glamour to these candle jars. Get creative with your designs!
- Personalization: Consider adding fondant shapes or edible printed images to make these candles even more personalized and special.
- Recipe Adaptations for Dietary Restrictions: To accommodate dietary restrictions, use vegan or gluten-free cupcakes and frosting. Make sure you verify the ingredients for any allergens.
Be Extra with these Candle Cake Jars:
- Layering Technique: Create multi-layered candles. Instead of one cupcake per jar, consider stacking smaller pieces of cupcakes, alternating with layers of frosting for a visually enjoyable effect.
- Textured Effects: Use different piping tips for the frosting to create textured effects on the ‘candle wax’. Add nuts or chocolate chips to add texture to each bite.
- Edible Designs: Use edible markers or food-safe paint to create designs on the candle Jars. Drawing small patterns or designs on the candle part can add a personalized touch.
- Candle Holder Decor: Decorate the outside of the jars with ribbons, decorative twine, or personalized labels to enhance the candle’s presentation.
- Sharing and Presentation: Consider presenting these candle cake jars as a surprise dessert at dinner parties, birthdays, or any special occasion to impress your guests with both the visual and gustatory delight.
Safety and Storage:
- Ensure the candles are consumed within a reasonable time to retain freshness and taste.
- Store them in a cool, dry place to prevent the chocolate from melting or becoming too soft.
Challenges and Solutions:
- Chocolate Melting: Ensure the melted chocolate is at the right consistency. If it becomes too thick or thin, you can adjust it by adding a bit of coconut oil (for thinning) or more chocolate (for thickening).
- Proper Drying Time: Allow ample time for the pretzel wicks and flame decorations to dry before assembling the candles to prevent any mishaps.
- Jar Sizes: Depending on the size of the jars, you might need to adjust the cupcake sizes or quantity to fit them perfectly.
Wrapping Up:
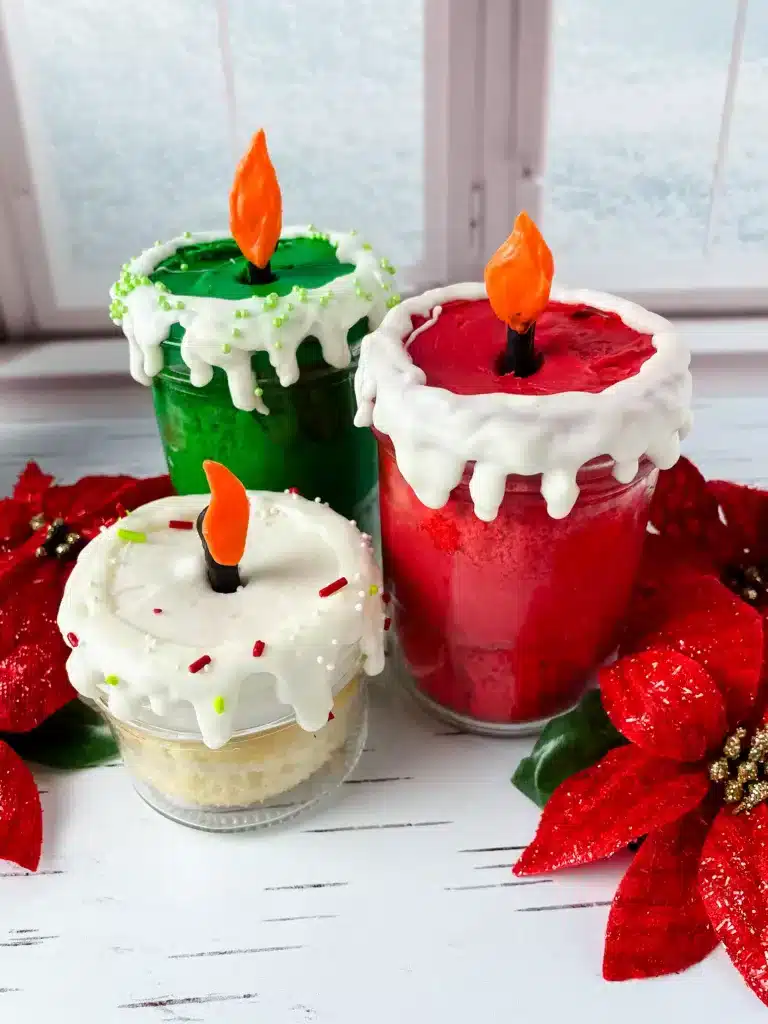
The steps are simple, and the end result is both visually stunning and delicious. With a few simple ingredients and a touch of creativity, anyone can master the art of making cake candle jars.
These cake candle jars are not only visually appealing but also a delight to eat. The combination of cupcakes, buttercream, and chocolate mimics the look of candles and provides an opportunity to craft edible art while delighting taste buds. Whether its for a festive celebration or a special dessert, these edible candles are sure to spark joy and curiosity. Enjoy the process of creating these delightful cake jars.
For More Festive Fun Check Out these Fun Recipes:
Lets Connect:
Enjoying the yummy recipes on my blog? Don’t forget to share, comment, and subscribe for more delicious content! If you recreate any of these tasty dishes, be sure to tag me @torriemadeit on all platforms, I wanna see your kitchen magic!
How to Make Candle Cake Jars
Equipment
- Measuring Cups
- 3 small bowls
- Spatula
- Piping Bags
- 3 microwave-safe bowls
- 3 jars two 8 oz and one 4 oz
Ingredients
- 2 Red Cupcakes
- 2 Green Cupcakes
- 1 White Cupcake
- Mini Pretzel Sticks
- White Buttercream
- 3 Ounces White Chocolate Candy Melts
- 1 Ounce Black Chocolate Candy Melts
- Orange Candy Color
- Red Food Gel Color
- Green Food Gel Color
- Sprinkles (optional)
Instructions
- Instructions:
- Begin by splitting your white chocolate melts into two microwave-safe bowls.
- placing a third or 1 ounce of the white melts in one bowl and the rest in the other. Heat up the chocolate in both bowls for 30 seconds and then stir. If the chocolate has not completely melted, place them back in the microwave, warming them in 15-second intervals while stirring until the chocolate achieves a liquid consistency.
- Add 3 drops of orange Candy Color into the smaller bowl of melted chocolate and mix thoroughly. If you have orange chocolate melts, you can skip this step.
- Transfer the melted chocolates into separate piping bags, tying the ends securely.
- Melt your black candy melts using the same method as above.
- Place pretzel sticks on a sheet of parchment paper and either pipe or dip them in the black chocolate.
- With the orange chocolate, create small tear drops on another sheet of parchment paper. These will serve as the flames. Let both the pretzel sticks and flames sit for 10 minutes to dry.
- Once solid, put 1-2 drops of orange chocolate on the tip of the pretzel and attach the orange flame. Let it dry for an additional 5 minutes.
- While the items are drying, divide your buttercream frosting into three separate bowls. Color one bowl of frosting green, another red, and leave the third bowl white.
- Assemble the Green & Red Candles:
- Place one cupcake in the jar, gently pressing it down to touch the bottom.
- Add a layer of buttercream in the jar on top of the cupcake, either using a piping bag or spoon.
- Position another cupcake on top of the buttercream and add more buttercream on top of the second cupcake. Smooth the top using a spoon or spatula.
- Insert the pretzel candle wick in the middle of the jar.
- Warm the white chocolate in the piping bag for 15 seconds to make it liquid again. Cut a small hole at the tip of the bag.
- Pipe the chocolate around the top of the jar, allowing it to drip down the sides. Apply some chocolate on the buttercream frosting to create a melted candle effect.
- Repeat the same assembly steps for the small white candle.
- If you plan to add sprinkles or decorations, do so while the chocolate is still wet.
- Once the chocolate has solidified, display the candles or indulge in this delicious creation!
This post contains affiliate links. If you purchase from some of these links I will receive a small commission but it will Not add any additional cost to you.


